eFax by RingCentral

We are switch over to “paperless” eFax by RingCentral.

This will allow us to send faxes via email and also receive fax into email inbox.

Fax numbers by department
Department FAX Number Manager Inbound email Inbound Fax Recipient(s)
Accounting 408-389-7840 David fax-acct@klsupply.com David/Thi
Customer Service 408-727-4842 Rich fax-cs@klsupply.com Rich
RnD/OEM/Purchasing 408-727-4305 Rich fax-rndoem@klsupply.com Rich
Sales 408-727-1576 Sarah fax-sales@klsupply.com Sarah

The “Inbound Fax Recipient(s)” will receive inbound faxes of the fax number via email with PDF attachment.

The outbound fax contents can be one of the following:
PDF File
Microsoft Word Document File
Microsoft Excel Document File
TIFF, JPEG, etc
Supported File Attachments for Faxes

Here is HowTo send faxes via email:

  1. In your email client, create a new email.
  2. In the recipient’s box, enter the 10-digit fax phone number of the person or business you are faxing followed immediately by “@rcfax.com”.
  3. Attach the file you want to fax.
  4. Add a text on the subject line if you’re going to add a cover page.

VIDEO: Send Faxes via email with RingCentral

[HowTo] Adjusting Outlook server timeout setting

In the event of the mail server being busy hung up on something(most of the cases, if you are sending/receiving a large email attachments), you may get a pop-up window saying “Server Timeout”.

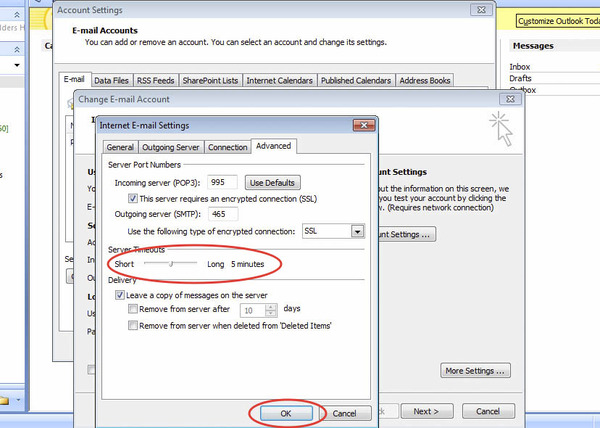
The solution is to extend the amount of time Outlook will wait until it deems the sending/receiving to have failed. The default is 1 minute, so extending this to 5mins should do the trick

Here is an instruction how to change the Outlook server timeout setting:

In Outlook 2007 case:

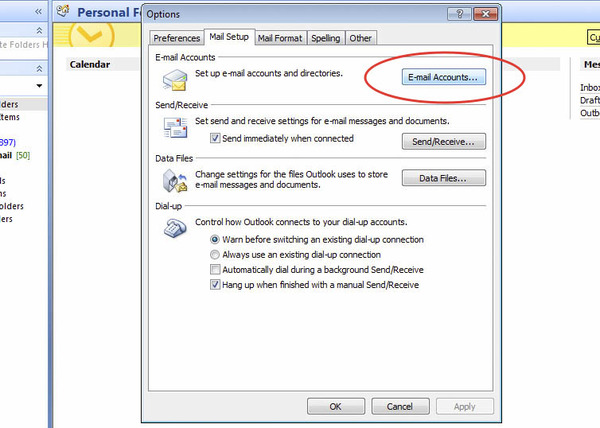
  1. From the Tools menu, select E-mail Accounts…
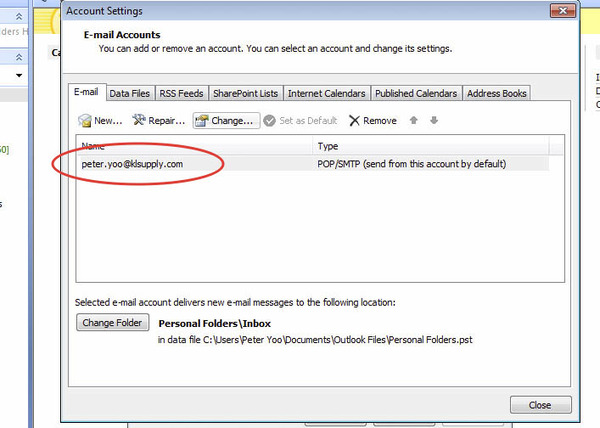
  2. Select View or change existing e-mail accounts and click Next.
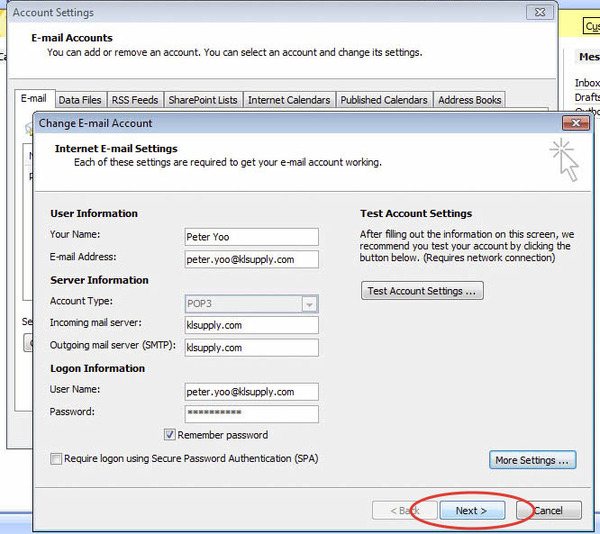
  3. Select the e-mail you want to modify and click Change.
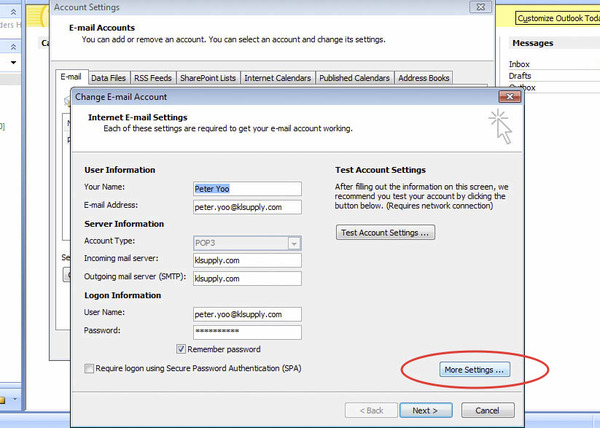
  4. To bring up the Internet E-Mail Settings window, click More Settings…
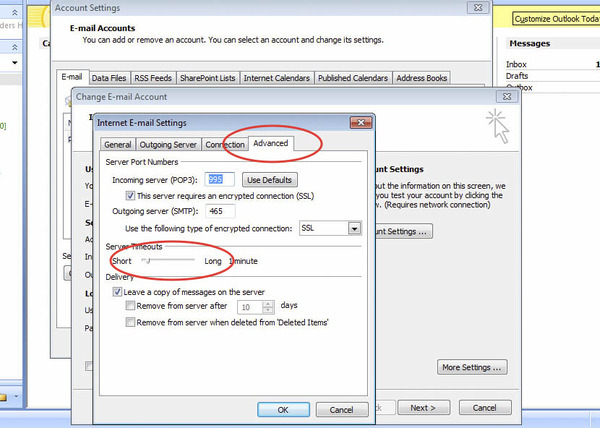
  5. Select the Advanced tab.
  6. Left click on the slide-point and drag to the far right side (10 minutes). By changing the setting, you can avoid the above error message.
  7. Click Apply and then OK.


In Outlook 2010 case:

  1. Click on the orange ‘File’ tab.
  2. Under the ‘info section, click on the ‘Account Settings’ button and then on the ‘Account Settings…’ option from the menu. The Account Settings window will open.
  3. Under the ‘E-Mail’ tab, find the IMAP account affected, select it and click on the ‘Change…’ button (or double-click it)
  4. Click on the ‘More Settings…’ button.
  5. Under the ‘Advanced’ tab you will find the ‘Server Timeouts’ option.
  6. Move the slider towards the right (long) to the desired value (5mins?)
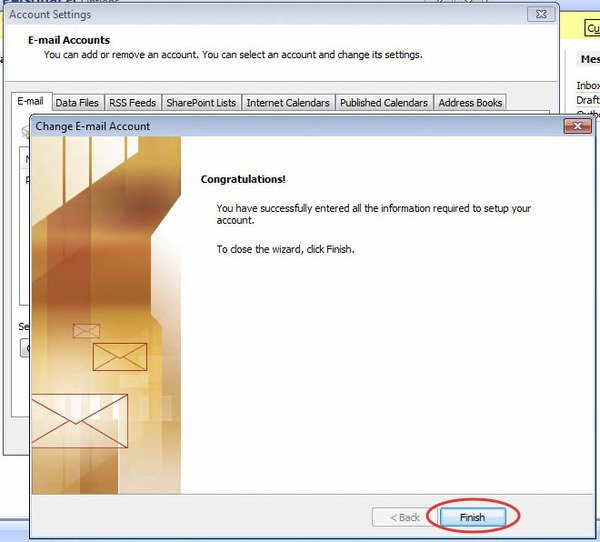
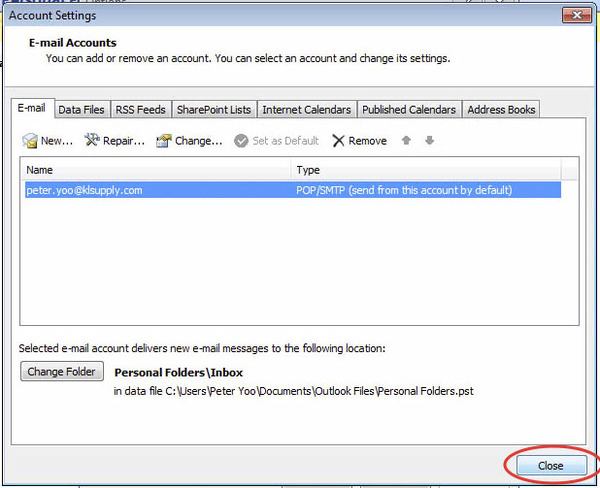
  7. Click OK and close all the windows.

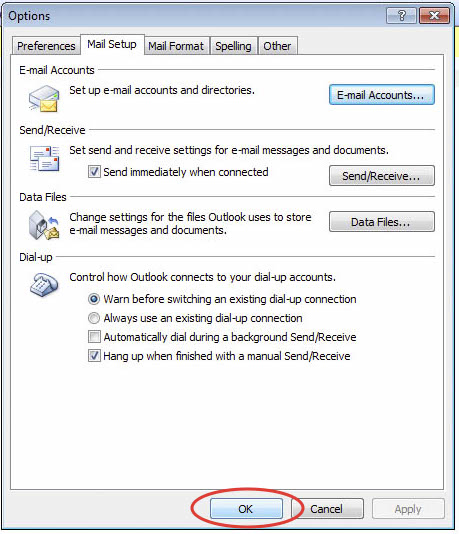
Here are some screen shots:

OutlookTimeout

OutlookTimeout2

OutlookTimeout3

OutlookTimeout4

OutlookTimeout5

OutlookTimeout6

OutlookTimeout7

OutlookTimeout8

OutlookTimeout9

OutlookTimeout10